CSS見出しデザイン参考100選!コピペ可!どこよりも詳しく解説!
CSS
- 利用シーン例
- CSSだけで見出しのデザインを作りたい場合
CSS逆引きレシピ
このページの情報で解決しなかったら
検索してみましょう
CSS逆引き検索
- 関連
今回はCSSのみで作れる見出しデザインについて100個サンプルを作ってみました。
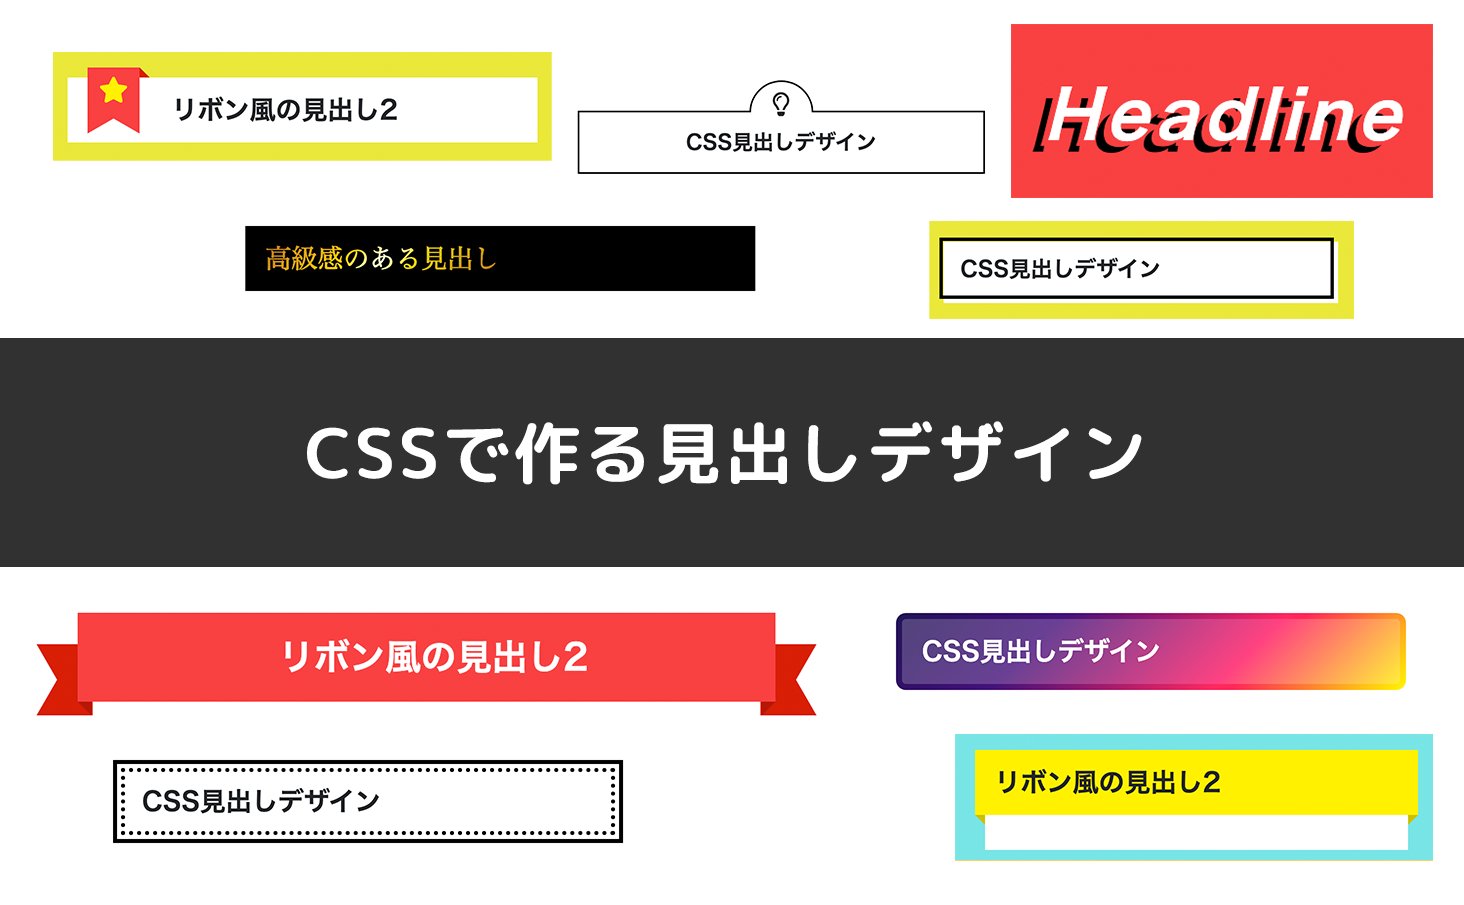
見出しなどで使えるデザイン例についてどこよりも詳しく(おそらく..)紹介・解説しています。すべてCSSのみで実現しているものになりまります。
コピペしてそのまま使用していただいて構いません。デザイン例によって作成時のポイントや注意点も書いています。
CSSのみで作る見出しについて
見出しについて、マークアップで使用されるHTMLタグはh1〜h6になるかと思います。サンプルのHTMLではh2を例にしていますが、hタグである必要はありません。ご自由なHTMLタグにスタイルを当ててください。
サンプルの中には、IEではIE用にスタイルを追加しなければいけないものもあります。そのようなCSSはサンプルでは書いていないので、IE対応が必要な場合は確認してIE用スタイルを追加するようにしてください。
CSSで見出しを作る時のポイント
CSSで見出しを作る際にはいくつかポイントがあります。
複数行を想定した作りにする
見出しなどで使えるデザインでは複数行になることを考えたデザインにすることが重要です。デザイン作成時は一行のみでデザインしていたから問題なかったけど、運用時に文字数が多くなって複数行となったら崩れてしまった、という場合も多いです。
1行のみを想定した見出しであれば問題ありませんが、複数行にする可能性がある見出しデザインを作成する場合は注意が必要です。
ブラウザのデフォルトCSSに注意する
hタグについては、各ブラウザごとにデフォルトでスタイルが適用されています。リセットCSS・ノーマライズCSSなど、デフォルトCSSについて何も調整をしていない場合、ブラウザによって表示の差異が発生する場合があるので注意しましょう。
シンプルな見出し
シンプルな見出しです。実際にはシンプルな見出しが一番使用するケースが多いのではないでしょうか。色についてはご自由に編集してください。
下線
<h2>CSS見出しデザイン</h2>.btn--orange,
h2 {
border-bottom: 3px solid #000;
}
下線を引いています。
点線
<h2>CSS見出しデザイン</h2>h2 {
border-bottom: 3px dotted #000;
}
点線を引いています。
破線
<h2>CSS見出しデザイン</h2>h2 {
border-bottom: 3px dashed #000;
}
破線を引いています。
二重線
<h2>CSS見出しデザイン</h2>h2 {
border-bottom: 6px double #000;
}
二重線を引いています。
左線
<h2>CSS見出しデザイン</h2>h2 {
padding: 1rem 2rem;
border-left: 4px solid #000;
}
左側に線を引いています。
左点線
<h2>CSS見出しデザイン</h2>h2 {
padding: 1rem 2rem;
border-left: 4px dotted #000;
}
左側に点線を引いています。
左破線
<h2>CSS見出しデザイン</h2>h2 {
padding: 1rem 2rem;
border-left: 4px dashed #000;
}
左側に破線を引いています。
左二重線
<h2>CSS見出しデザイン</h2>h2 {
padding: 1rem 2rem;
border-left: 6px double #000;
}
左側に二重線を引いています。
囲み線
<h2>CSS見出しデザイン</h2>h2 {
padding: 1rem 2rem;
border: 3px solid #000;
}
囲み線を引いています。
囲み線
<h2>CSS見出しデザイン</h2>h2 {
padding: 1rem 2rem;
border: 3px solid #000;
}
囲み線を引いています。
囲み点線
<h2>CSS見出しデザイン</h2>h2 {
padding: 1rem 2rem;
border: 3px dotted #000;
}
囲み点線を引いています。
囲み破線
<h2>CSS見出しデザイン</h2>h2 {
padding: 1rem 2rem;
border: 3px dashed #000;
}
囲み破線を引いています。
囲み二重線
<h2>CSS見出しデザイン</h2>h2 {
padding: 1rem 2rem;
border: 6px double #000;
}
囲み二重線を引いています。
囲み二重線2
<h2>CSS見出しデザイン</h2>
h2 {
  position: relative;
  padding: 1rem 2rem;
  border: 4px solid #000;
}

h2:before {
  position: absolute;
  top: 4px;
  left: 4px;
  width: calc(100% - 8px);
  height: calc(100% - 8px);
  content: '';
  border: 2px solid #000;
}
線幅が異なる囲み二重線を引いています。
囲み二重点線
<h2>CSS見出しデザイン</h2>
h2 {
  position: relative;
  padding: 1.5rem 2.5rem;
  border: 4px solid #000;
}

h2:before {
  position: absolute;
  top: 4px;
  left: 4px;
  width: calc(100% - 8px);
  height: calc(100% - 8px);
  content: '';
  border: 4px dotted #000;
}
囲み二重点線を引いています。ドットが可愛らしいデザインです。
囲み二重点線2
<h2>CSS見出しデザイン</h2>h2 {
position: relative;
padding: 1.5rem 2rem;
border: 4px solid #000;
}
h2:before,
h2:after {
position: absolute;
left: 0;
width: 100%;
content: '';
border-top: 4px dotted #000;
}
h2:before {
top: 6px;
}
h2:after {
bottom: 6px;
}
上下に二重点線を引いています。borderはdottedではなく、dashedのほうが刺繍のようなイメージが出ていいかもしれませんね。
上下線
<h2>CSS見出しデザイン</h2>h2 {
padding: 1rem 2rem;
border-top: 3px solid #000;
border-bottom: 3px solid #000;
}
上下に線を引いています。シンプルですが良く使われるデザインです。
上下点線
<h2>CSS見出しデザイン</h2>h2 {
padding: 1rem 2rem;
border-top: 3px dotted #000;
border-bottom: 3px dotted #000;
}
上下に点線を引いています。
上下破線
<h2>CSS見出しデザイン</h2>h2 {
padding: 1rem 2rem;
border-top: 3px dashed #000;
border-bottom: 3px dashed #000;
}
上下に破線を引いています。
上下二重線
<h2>CSS見出しデザイン</h2>h2 {
padding: 1rem 2rem;
border-top: 6px double #000;
border-bottom: 6px double #000;
}
上下に二重線を引いています。
背景を入れた見出し
背景に色を付けるなどしたシンプルな見出しデザインです。
背景に色を入れたデザイン
<h2>CSS見出しデザイン</h2>h2 {
padding: 1rem 2rem;
background: #f4f4f4;
}
解説例不要だと思いますが、、背景に色を入れたパターンです。
背景に色・線を入れたデザイン
<h2>CSS見出しデザイン</h2>h2 {
padding: 1rem 2rem;
border-left: 5px solid #000;
background: #f4f4f4;
}
背景色と左側に線を入れたパターンです。
背景に色・下線を入れたデザイン
<h2>CSS見出しデザイン</h2>h2 {
padding: 1rem 2rem;
border-bottom: 3px solid #000;
background: #f4f4f4;
}
背景色と下に線を入れたパターンです。
背景に色・上線を入れたデザイン
<h2>CSS見出しデザイン</h2>h2 {
padding: 1rem 2rem;
border-top: 3px solid #000;
background: #f4f4f4;
}
背景色と上に線を入れたパターンです。
背景に色・点線を入れたデザイン
<h2>CSS見出しデザイン</h2>h2 {
padding: 1rem 2rem;
border-left: 5px dotted #000;
background: #f4f4f4;
}
背景色と左側に点線を入れたパターンです。
背景に色・点線を入れたデザイン2
<h2>CSS見出しデザイン</h2>h2 {
padding: 1rem 2rem;
border-bottom: 3px dotted #000;
background: #f4f4f4;
}
背景色と下に点線を入れたパターンです。
背景に色・破線を入れたデザイン
<h2>CSS見出しデザイン</h2>h2 {
padding: 1rem 2rem;
border-left: 5px dashed #000;
background: #f4f4f4;
}
背景色と左側に破線を入れたパターンです。
背景に色・破線を入れたデザイン2
<h2>CSS見出しデザイン</h2>h2 {
padding: 1rem 2rem;
border-bottom: 3px dashed #000;
background: #f4f4f4;
}
背景色と左側に破線を入れたパターンです。
背景に色・破線を入れたデザイン3
<h2>CSS見出しデザイン</h2>h2 {
padding: 1rem 2rem;
border-top: 3px dashed #000;
background: #f4f4f4;
}
背景色と上側に破線を入れたパターンです。
背景に色・二重線を入れたデザイン1
<h2>CSS見出しデザイン</h2>h2 {
padding: 1rem 2rem;
border-left: 6px double #000;
background: #f4f4f4;
}
背景色と左側に二重線を入れたパターンです。
背景に色・二重線を入れたデザイン2
<h2>CSS見出しデザイン</h2>h2 {
padding: 1rem 2rem;
border-bottom: 6px double #000;
background: #f4f4f4;
}
背景色と下側に二重線を入れたパターンです。
背景に色・二重線を入れたデザイン2
<h2>CSS見出しデザイン</h2>h2 {
padding: 1rem 2rem;
border-top: 6px double #000;
background: #f4f4f4;
}
背景色と上側に二重線を入れたパターンです。
背景・影を入れたデザイン
<h2>CSS見出しデザイン</h2>h2 {
padding: 1rem 2rem;
color: #fff;
background: #094;
-webkit-box-shadow: 5px 5px 0 #007032;
box-shadow: 5px 5px 0 #007032;
}
拡がりの無い影を指定しています。
下線にアクセントを入れたデザイン
<h2>CSS見出しデザイン</h2>h2 {
position: relative;
padding: 1rem 2rem;
border-bottom: 6px solid #094;
}
h2:before {
position: absolute;
bottom: -6px;
left: 0;
width: 20%;
height: 6px;
content: '';
background: #00cc5b;
}
下線に色を重ねるアクセントを追加しています。
背景色・線を工夫したデザイン
<h2>CSS見出しデザイン</h2>h2 {
position: relative;
padding: 1rem 2rem calc(1rem + 8px);
background: #fff;
}
h2:before {
position: absolute;
top: -5px;
left: -5px;
width: 100%;
height: 100%;
content: '';
border: 4px solid #000;
}
背景色がある場合のデザイン例です。
背景色・線を工夫したデザイン2
<h2>CSS見出しデザイン</h2>h2 {
position: relative;
padding: 1rem 2rem calc(1rem + 10px);
background: #fff100;
}
h2:before {
position: absolute;
top: -7px;
left: -7px;
width: 100%;
height: 100%;
content: '';
border: 4px solid #000;
}
見出し背景色と線を工夫したデザイン例です。
線を工夫した見出し
シンプルに線を工夫した見出しデザインになります。サンプルでは黒線ですが色を変えてみるのも良いでしょう。
ストライプの線を引いたデザイン
<h2>CSS見出しデザイン</h2>h2 {
position: relative;
padding: 1.5rem 1rem;
}
h2:after {
position: absolute;
bottom: 0;
left: 0;
width: 100%;
height: 10px;
content: '';
background-image: -webkit-repeating-linear-gradient(135deg, #000, #000 1px, transparent 2px, transparent 5px);
background-image: repeating-linear-gradient(-45deg, #000, #000 1px, transparent 2px, transparent 5px);
background-size: 7px 7px;
-webkit-backface-visibility: hidden;
backface-visibility: hidden;
}
ストライプの線を引いた見出しのデザインです。線の色を変える場合は、liner-gradientで指定している色の値を変更してください。
ストライプの線を引いたデザイン2
<h2>CSS見出しデザイン</h2>h2 {
position: relative;
padding: 1.5rem 1.5rem calc(1.5rem + 10px);
border: 2px solid #000;
}
h2:after {
position: absolute;
bottom: 0;
left: 0;
width: 100%;
height: 10px;
content: '';
border-top: 2px solid #000;
background-image: -webkit-repeating-linear-gradient(135deg, #000, #000 1px, transparent 2px, transparent 5px);
background-image: repeating-linear-gradient(-45deg, #000, #000 1px, transparent 2px, transparent 5px);
background-size: 7px 7px;
-webkit-backface-visibility: hidden;
backface-visibility: hidden;
}
見出し全体を枠線で囲み、陰影に見えるような箇所をストライプにしてみたデザインです。
シンボルを中央に入れたデザイン
<h2><i class="far fa-lightbulb"></i><span>CSS見出しデザイン</span></h2>h2 {
position: relative;
padding: 1.5rem;
text-align: center;
border: 2px solid #000;
background: #fff;
}
h2:before,
h2:after {
position: absolute;
content: '';
}
h2:before {
top: -40px;
left: calc(50% - 40px);
width: 80px;
height: 80px;
border: 2px solid #000;
border-radius: 50%;
background: #fff;
}
h2:after {
top: 0;
left: 0;
width: 100%;
height: 100%;
background: #fff;
}
h2 i {
font-size: 30px;
font-size: 3rem;
line-height: 60px;
position: absolute;
z-index: 1;
top: -40px;
left: calc(50% - 40px);
width: 80px;
height: 60px;
text-align: center;
}
h2 span {
position: relative;
z-index: 1;
}
少し強引ですが、擬似クラスなどを重ねて表現しています。アイコンはFont Awesomeを使用しています。
ステッチ風のデザイン
<h2><i class="far fa-lightbulb"></i><span>CSS見出しデザイン</span></h2>h2 {
position: relative;
text-align: center;
border: 2px solid #000;
background: #fff;
}
h2:before,
h2:after {
position: absolute;
content: '';
}
h2:before {
top: -40px;
left: calc(50% - 40px);
width: 80px;
height: 80px;
border: 2px solid #000;
border-radius: 50%;
background: #fff;
}
h2:after {
top: 4px;
left: 4px;
width: calc(100% - 8px);
height: calc(100% - 8px);
border: 2px dashed #000;
background: #fff;
}
h2 i {
font-size: 24px;
font-size: 2.4rem;
line-height: 60px;
position: absolute;
z-index: 2;
top: -40px;
left: calc(50% - 40px);
width: 80px;
height: 60px;
text-align: center;
}
h2 span {
position: relative;
z-index: 1;
display: block;
padding: 1.5rem;
}
h2 span:before,
h2 span:after {
position: absolute;
content: '';
}
h2 span:before {
top: -34px;
left: calc(50% - 34px);
width: 68px;
height: 40px;
border: 2px dashed #000;
border-radius: 50vw 50vw 0 0;
}
h2 span:after {
position: absolute;
top: 4px;
left: calc(50% - 32px);
width: 64px;
height: 10px;
background: #fff;
}
刺繍・パッチワークのようなデザインイメージです。
両サイドに二重線
<h2>CSS見出しデザイン</h2>h2 {
position: relative;
display: inline-block;
padding: 0 65px;
text-align: center;
}
h2:before,
h2:after {
position: absolute;
top: calc(50% - 3px);
width: 50px;
height: 6px;
content: '';
border-top: solid 2px #000;
border-bottom: solid 2px #000;
}
h2:before {
left: 0;
}
h2:after {
right: 0;
}
両サイドに二重線を引いています。サンプルではhタグをinline-blockにしています。
両サイドに線
<h2><span>CSS見出しデザイン</span></h2>h2 {
position: relative;
padding: 0 65px;
text-align: center;
}
h2:before {
position: absolute;
top: calc(50% - 1px);
left: 0;
width: 100%;
height: 2px;
content: '';
background: #000;
}
h2 span {
position: relative;
padding: 0 1em;
background: #fff;
}
両サイドに線を引いているように見えますが、実際は背景となる要素に線を引き、文字に背景色を指定しています。このようにすることで、幅いっぱいに線を引くことができ、かつ文字数による線の横幅を気にする必要もなくなります。
下に小さな線
<h2><span>CSS見出しデザイン</span></h2>h2 {
position: relative;
padding: 1.5rem;
text-align: center;
}
h2:before {
position: absolute;
bottom: -10px;
left: calc(50% - 30px);
width: 60px;
height: 5px;
content: '';
border-radius: 3px;
background: #000;
}
よくある見出しのデザインですね。中央寄せを前提としたデザインです。
下に小さな線2
<h2><span>CSS見出しデザイン</span></h2>h2 {
font-size: 30px;
font-size: 3rem;
position: relative;
padding: 1.5rem;
text-align: center;
}
h2 span {
font-size: 18px;
font-size: 1.8rem;
display: block;
}
h2:before {
position: absolute;
bottom: -10px;
left: calc(50% - 30px);
width: 60px;
height: 5px;
content: '';
border-radius: 3px;
background: #fa4141;
}
よくある見出しのデザインとして、英字を大きくしたパターンです。
グラデーションを使った見出し
グラデーションを使った見出しデザインです。
背景グラデーション
<h2>CSS見出しデザイン</h2>h2 {
padding: 1rem 2rem;
color: #fff;
background-image: -webkit-gradient(linear, left top, right top, from(#fa709a), to(#fee140));
background-image: -webkit-linear-gradient(left, #fa709a 0%, #fee140 100%);
background-image: linear-gradient(to right, #fa709a 0%, #fee140 100%);
}
見出しの背景をグラデーションにしたパターンです。
背景グラデーション角丸
<h2>CSS見出しデザイン</h2>h2 {
padding: 1rem 2rem;
color: #fff;
border-radius: 10px;
background-image: -webkit-gradient(linear, left top, right top, from(#f83600), to(#f9d423));
background-image: -webkit-linear-gradient(left, #f83600 0%, #f9d423 100%);
background-image: linear-gradient(to right, #f83600 0%, #f9d423 100%);
}
背景をグラデーションにして、角丸をつけたパターンです。
背景グラデーション角丸大
<h2>CSS見出しデザイン</h2>h2 {
padding: 1rem 3rem;
color: #fff;
border-radius: 100vh;
background-image: -webkit-gradient(linear, right top, left top, from(#9be15d), to(#00e3ae));
background-image: -webkit-linear-gradient(right, #9be15d 0%, #00e3ae 100%);
background-image: linear-gradient(to left, #9be15d 0%, #00e3ae 100%);
}
角丸のサイズを大きくした例です。角丸の使い方についてはこちらをご参考ください。
背景グラデーション傾斜
<h2>CSS見出しデザイン</h2>h2 {
padding: 1rem 3rem;
-webkit-transform: skew(-15deg);
transform: skew(-15deg);
color: #fff;
background-image: -webkit-gradient(linear, left top, right top, from(#209cff), to(#68e0cf));
background-image: -webkit-linear-gradient(left, #209cff 0%, #68e0cf 100%);
background-image: linear-gradient(to right, #209cff 0%, #68e0cf 100%);
}
見出しにtransfomr: skewを適用して要素を傾けています。
下線グラデーション
<h2>CSS見出しデザイン</h2>h2 {
position: relative;
padding: 1rem .5rem;
}
h2:after {
position: absolute;
bottom: 0;
left: 0;
width: 100%;
height: 5px;
content: '';
background-image: -webkit-gradient(linear, left top, right top, from(#fa709a), to(#fee140));
background-image: -webkit-linear-gradient(left, #fa709a 0%, #fee140 100%);
background-image: linear-gradient(to right, #fa709a 0%, #fee140 100%);
}
下線をグラデーションにしています。
角丸下線グラデーション
<h2>CSS見出しデザイン</h2>h2 {
position: relative;
padding: 1rem .5rem;
}
h2:after {
position: absolute;
bottom: 0;
left: 0;
width: 100%;
height: 6px;
content: '';
border-radius: 3px;
background-image: -webkit-gradient(linear, right top, left top, from(#2af598), to(#009efd));
background-image: -webkit-linear-gradient(right, #2af598 0%, #009efd 100%);
background-image: linear-gradient(to left, #2af598 0%, #009efd 100%);
}
角丸下線をグラデーションにしています。
下線グラデーション2
<h2>CSS見出しデザイン</h2>h2 {
position: relative;
padding: 1rem .5rem;
color: #fff;
}
h2:after {
position: absolute;
bottom: 0;
left: 0;
width: 100%;
height: 6px;
content: '';
border-radius: 3px;
background-image: -webkit-linear-gradient(20deg, yellow, blue, orange, purple, green, red);
background-image: linear-gradient(70deg, yellow, blue, orange, purple, green, red);
}
グラデーションをよりカラフルにしたパターンです。
上下線グラデーション
<h2>CSS見出しデザイン</h2>h2 {
position: relative;
padding: 1rem .5rem;
}
h2:before,
h2:after {
position: absolute;
left: 0;
width: 100%;
height: 4px;
content: '';
background-image: -webkit-gradient(linear, right top, left top, from(#30cfd0), to(#330867));
background-image: -webkit-linear-gradient(right, #30cfd0 0%, #330867 100%);
background-image: linear-gradient(to left, #30cfd0 0%, #330867 100%);
}
h2:before {
top: 0;
}
h2:after {
bottom: 0;
}
見出しの上下の線をグラデーションにしたパターンです。
囲い線グラデーション
<h2><span>CSS見出しデザイン</span></h2>h2 {
position: relative;
padding: 6px;
background-image: -webkit-linear-gradient(315deg, #231557 0%, #44107a 29%, #ff1361 67%, #fff800 100%);
background-image: linear-gradient(-225deg, #231557 0%, #44107a 29%, #ff1361 67%, #fff800 100%);
}
h2 span {
display: block;
padding: 1rem 2rem;
background: #fff;
}
見出しを囲っている線をグラデーションにしたパターンです。実際は線にグラデーションをかけているわけではなく、グラデーション背景の上に白地の見出しを乗せている形になっています。
囲い線グラデーション
<h2><span>CSS見出しデザイン</span></h2>h2 {
position: relative;
padding: 6px;
color: #fff;
border-radius: 10px;
background-image: -webkit-linear-gradient(315deg, #231557 0%, #44107a 29%, #ff1361 67%, #fff800 100%);
background-image: linear-gradient(-225deg, #231557 0%, #44107a 29%, #ff1361 67%, #fff800 100%);
}
h2 span {
display: block;
padding: 1rem 2rem;
border-radius: 4px;
background: rgba(255, 255, 255, .2);
}
前述したデザイン例を合わせてみたパターンです。
テキストグラデーション
<h2><span>CSS見出しデザイン</span></h2>h2 {
padding: 1rem 2rem;
background-image: -webkit-linear-gradient(315deg, #231557 0%, #44107a 29%, #ff1361 67%, #fff800 100%);
background-image: linear-gradient(-225deg, #231557 0%, #44107a 29%, #ff1361 67%, #fff800 100%);
}
h2 span {
background-image: -webkit-gradient(linear, right top, left top, from(#e14fad), to(#f9d423));
background-image: -webkit-linear-gradient(right, #e14fad 0%, #f9d423 100%);
background-image: linear-gradient(to left, #e14fad 0%, #f9d423 100%);
-webkit-background-clip: text;
-webkit-text-fill-color: transparent;
}
background-clip: text;を使ってテキストにグラデーションをあしらっています。
ゴールドグラデーション
<h2>CSS見出しデザイン</h2>h2 {
padding: 1rem 2rem;
color: #fff;
background-image: -webkit-linear-gradient(315deg, #704308 0%, #ffce08 40%, #e1ce08 60%, #704308 100%);
background-image: linear-gradient(135deg, #704308 0%, #ffce08 40%, #e1ce08 60%, #704308 100%);
}
ゴールドをイメージしたグラデーションのパターンです。実際に使用する際にはテキストに影を付けたり、色を調整してコントラストを大きくするなどして、もっとテキストと背景にメリハリを出して文字を見やすくする工夫をしたほうが良いでしょう。
文字ゴールドグラデーション
<h2><span>CSS見出しデザイン</span></h2>h2 {
font-family: 'ヒラギノ明朝 Pro W3', 'Hiragino Mincho Pro', 'Hiragino Mincho ProN', 'HGS明朝E', 'MS P明朝', serif;
padding: 1rem 2rem;
color: #fff;
background: #000;
}
h2 span {
background-image: -webkit-linear-gradient(315deg, #b8751e 0%, #ffce08 37%, #fefeb2 47%, #fafad6 50%, #fefeb2 53%, #e1ce08 63%, #b8751e 100%);
background-image: linear-gradient(135deg, #b8751e 0%, #ffce08 37%, #fefeb2 47%, #fafad6 50%, #fefeb2 53%, #e1ce08 63%, #b8751e 100%);
-webkit-background-clip: text;
-webkit-text-fill-color: transparent;
}
テキストをゴールドにしたパターンです。黒背景との相性が良いです。高級感を訴求したいコンテンツに合う見出しデザイン例です。
上下線ゴールドグラデーション
<h2>CSS見出しデザイン</h2>h2 {
font-family: 'ヒラギノ明朝 Pro W3', 'Hiragino Mincho Pro', 'Hiragino Mincho ProN', 'HGS明朝E', 'MS P明朝', serif;
position: relative;
padding: 1.5rem 2rem;
-webkit-box-shadow: 0 2px 14px rgba(0, 0, 0, .1);
box-shadow: 0 2px 14px rgba(0, 0, 0, .1);
}
h2:before,
h2:after {
position: absolute;
left: 0;
width: 100%;
height: 4px;
content: '';
background-image: -webkit-linear-gradient(315deg, #704308 0%, #ffce08 40%, #e1ce08 60%, #704308 100%);
background-image: linear-gradient(135deg, #704308 0%, #ffce08 40%, #e1ce08 60%, #704308 100%);
}
h2:before {
top: 0;
}
h2:after {
bottom: 0;
}
上下の線をゴールドにして、影を付けたパターンです。和風・高級といったイメージに合う見出しデザイン例です。
金属感のある見出し
<h2>CSS見出しデザイン</h2>h2 {
padding: 1rem 2rem;
border-top: 4px solid #d8dcdc;
border-right: 4px solid #666;
border-bottom: 4px solid #333;
border-left: 4px solid #868888;
border-radius: 0;
background-image: -webkit-linear-gradient(135deg, #ccc 0%, #868888 20%, #d8dcdc 34%, white 53%, #ccc 100%);
background-image: linear-gradient(-45deg, #ccc 0%, #868888 20%, #d8dcdc 34%, white 53%, #ccc 100%);
}
上下左右それぞれ色の異なるborderを指定することでサンプルのような立体感のあるデザインになります。さらにシルバーのグラデーションをかけて金属感のある見出しにしています。
タグ風の見出し
タグ風の見出しデザイン例です。サンプルではdisplay:inline-blockを指定して、文字サイズによって見出しサイズが変わるようにしています。横幅いっぱいに広げたい場合はブロック要素となるようにinline-blockの記述を消すか、display: blockと指定してください。
タグ風見出し丸
<h2>CSS見出しデザイン</h2>h2 {
position: relative;
display: inline-block;
padding: 1rem 2rem 1rem 4rem;
color: #fff;
border-radius: 100vh 0 0 100vh;
background: #fa4141;
}
h2:before {
position: absolute;
top: calc(50% - 7px);
left: 10px;
width: 14px;
height: 14px;
content: '';
border-radius: 50%;
background: #fff;
}
タグっぽく見せるために擬似クラスで穴を表現しています。くり抜いているわけではないので、穴が合いているような表現をする場合は穴の色を背景色と合わせる必要があります。
タグ風見出し角
<h2>CSS見出しデザイン</h2>h2 {
position: relative;
display: inline-block;
height: 64px;
margin-left: 30px;
padding: 1rem 2rem 1rem 3rem;
color: #fff;
background: #fa4141;
}
h2:before {
position: absolute;
top: 0;
left: -30px;
content: '';
border-width: 32px 30px 32px 0;
border-style: solid;
border-color: transparent #fa4141 transparent transparent;
}
h2:after {
position: absolute;
top: calc(50% - 7px);
left: -10px;
width: 14px;
height: 14px;
content: '';
border-radius: 50%;
background: #fff;
}
角が尖っているタグ風見出しイメージです。サンプルでは複数行を想定していません。
リボン風の見出し
CSSで作るリボン風の見出しデザインです。ランキングやおすすめといった箇所で多く使えそうですね。
リボン風の見出し
<h2><span>CSS見出しデザイン</span></h2>h2 {
position: relative;
margin: 30px;
text-align: center;
}
h2:before,
h2:after {
position: absolute;
z-index: 0;
bottom: -10px;
display: block;
content: '';
border: 1em solid #d90606;
}
h2:before {
left: -30px;
border-left-width: 15px;
border-left-color: transparent;
}
h2:after {
right: -30px;
border-right-width: 15px;
border-right-color: transparent;
}
h2 span {
position: relative;
z-index: 1;
display: block;
padding: 1rem 2rem;
color: #fff;
background: #fa4141;
}
h2 span:before,
h2 span:after {
position: absolute;
bottom: -10px;
display: block;
width: 10px;
height: 10px;
content: '';
border-style: solid;
border-color: #b70505 transparent transparent transparent;
}
h2 span:before {
left: 0;
border-width: 10px 0 0 10px;
}
h2 span:after {
right: 0;
border-width: 10px 10px 0 0;
}
左右が折り返したリボン風の見出しデザインです。
リボン風の見出し2
<h2><span>CSS見出しデザイン</span></h2>h2 {
line-height: 60px;
position: relative;
height: 60px;
margin: 2em 50px 1em;
padding: 0 2rem;
text-align: center;
color: #fff;
background: #fa4141;
}
h2:before,
h2:after {
position: absolute;
top: 0;
display: block;
height: 48px;
content: '';
border: 30px solid #fa4141;
}
h2:before {
left: -40px;
border-left-width: 15px;
border-left-color: transparent;
}
h2:after {
right: -40px;
border-right-width: 15px;
border-right-color: transparent;
}
h2 span {
position: relative;
display: block;
}
左右が折り返したリボン風の見出しデザインです。複数行での使用は想定していません。
リボンの装飾が付いた見出し
<h2><span>CSS見出しデザイン</span></h2>h2 {
position: relative;
padding: 1rem 2rem 1rem 4em;
background: #fff;
}
h2 span {
position: absolute;
top: -10px;
left: 20px;
display: inline-block;
width: 52px;
height: 50px;
text-align: center;
background: #fa4141;
}
h2 span:before,
h2 span:after {
position: absolute;
content: '';
}
h2 span:before {
right: -10px;
width: 0;
height: 0;
border-right: 10px solid transparent;
border-bottom: 10px solid #d90606;
}
h2 span:after {
top: 50%;
left: 0;
display: block;
height: 50%;
border: 1em solid #fa4141;
border-bottom-width: 15px;
border-bottom-color: transparent;
}
見出しにリボンの装飾が付いたデザインです。サンプルでは背景が黄色、見出しが白色ですが、使用シーンに合わせて色を変えてください。
リボンの装飾が付いた見出し2
<h2><span><i class="fas fa-star"></i></span>リボン風の見出し</h2>h2 {
position: relative;
padding: 1rem 2rem 1rem 4em;
background: #fff;
}
h2 span {
position: absolute;
top: -10px;
left: 20px;
display: inline-block;
width: 52px;
height: 50px;
text-align: center;
background: #fa4141;
}
h2 span:before,
h2 span:after {
position: absolute;
content: '';
}
h2 span:before {
right: -10px;
width: 0;
height: 0;
border-right: 10px solid transparent;
border-bottom: 10px solid #d90606;
}
h2 span:after {
top: 50%;
left: 0;
display: block;
height: 50%;
border: 1em solid #fa4141;
border-bottom-width: 15px;
border-bottom-color: transparent;
}
h2 span i {
position: relative;
z-index: 1;
color: #fff100;
}
リボンにアイコンを付けてみたパターンです。
背景に回り込むイメージの見出し
<h2>リボン風の見出し</h2>h2 {
position: relative;
margin: 1rem -10px;
padding: 1rem 2rem;
background: #fff100;
}
h2:before,
h2:after {
position: absolute;
content: '';
}
h2:before {
bottom: -10px;
left: 0;
width: 0;
height: 0;
border-top: 10px solid #ccc100;
border-left: 10px solid transparent;
}
h2:after {
right: 0;
bottom: -10px;
width: 0;
height: 0;
border-top: 10px solid #ccc100;
border-right: 10px solid transparent;
}
背景に周り込むイメージの見出しです。サンプルコードでは背景要素は除いています。
背景に回り込むイメージの見出し2
<h2>リボン風の見出し</h2>h2 {
position: relative;
display: inline-block;
margin: 1rem 0 1rem -10px;
padding: 1rem 3rem;
color: #fff;
border-radius: 0 100vh 100vh 0;
background: #0075a9;
-webkit-box-shadow: 3px 3px 5px rgba(0, 0, 0, .2);
box-shadow: 3px 3px 5px rgba(0, 0, 0, .2);
}
h2:before {
position: absolute;
bottom: -10px;
left: 0;
width: 0;
height: 0;
content: '';
border-top: 10px solid #005276;
border-left: 10px solid transparent;
}
見出しの左側だけ背景に周り込んだイメージのデザインです。サンプルのように影を付けることでより立体感を出すことができます。
吹き出し風の見出し
CSSで作る吹き出し風の見出しデザインです。ポイントなどを訴求する時に良さそうなデザインです。
吹き出し風の見出し
<h2>吹き出し風の見出し</h2>h2 {
position: relative;
padding: 1.5rem 2rem;
color: #fff;
border-radius: 10px;
background: #094;
}
h2:after {
position: absolute;
bottom: -9px;
left: 1em;
width: 0;
height: 0;
content: '';
border-width: 10px 10px 0 10px;
border-style: solid;
border-color: #094 transparent transparent transparent;
}
吹き出し風の見出しです。人物・キャラクラーなどの写真・イラストと一緒に使うと良さそうですね。
吹き出し風の見出し2
<h2>吹き出し風の見出し</h2>h2 {
position: relative;
padding: 1.5rem 2rem;
border: 3px solid #d8d8d8;
border-radius: 10px;
background: #f9f9f9;
}
h2:before {
position: absolute;
bottom: -14px;
left: 1em;
width: 0;
height: 0;
content: '';
border-width: 14px 12px 0 12px;
border-style: solid;
border-color: #d8d8d8 transparent transparent transparent;
}
h2:after {
position: absolute;
bottom: -10px;
left: 1em;
width: 0;
height: 0;
content: '';
border-width: 14px 12px 0 12px;
border-style: solid;
border-color: #f9f9f9 transparent transparent transparent;
}
吹き出しに枠線を付けています。
線のみの吹き出し風見出し
<h2>吹き出し風の見出し</h2>h2 {
position: relative;
padding: 1.5rem 2rem;
border: 3px solid #d8d8d8;
border-radius: 10px;
background: #f9f9f9;
}
h2:before {
position: absolute;
bottom: -14px;
left: 1em;
width: 0;
height: 0;
content: '';
border-width: 14px 12px 0 12px;
border-style: solid;
border-color: #d8d8d8 transparent transparent transparent;
}
h2:after {
position: absolute;
bottom: -10px;
left: 1em;
width: 0;
height: 0;
content: '';
border-width: 14px 12px 0 12px;
border-style: solid;
border-color: #f9f9f9 transparent transparent transparent;
}
下線を吹き出しのようにしたイメージのデザインです。
線のみの吹き出し風見出し2
<h2>吹き出し風の見出し</h2>h2 {
position: relative;
padding: 1.5rem 2rem;
border-bottom: 3px solid #000;
border-left: 3px solid #000;
border-radius: 0 0 0 20px;
}
h2:before {
position: absolute;
right: 50px;
bottom: -21px;
width: 0;
height: 0;
content: '';
border-width: 21px 21px 0 0;
border-style: solid;
border-color: #000 transparent transparent transparent;
}
h2:after {
position: absolute;
right: 54px;
bottom: -14px;
width: 0;
height: 0;
content: '';
border-width: 14px 14px 0 0;
border-style: solid;
border-color: #fff transparent transparent transparent;
}
吹き出しの角を丸くして、吹き出しの形を変えたデザインです。
想像・悩み・考え事風見出し
<h2>吹き出し風の見出し</h2>h2 {
position: relative;
margin-bottom: 2em;
padding: 1.5rem 2rem;
border-radius: 10px;
background: #eee;
}
h2:before,
h2:after {
position: absolute;
content: '';
border-radius: 50%;
background: #eee;
}
h2:before {
bottom: -15px;
left: 30px;
width: 30px;
height: 30px;
}
h2:after {
bottom: -30px;
left: 50px;
width: 15px;
height: 15px;
}
何か考えごとをしているようなイメージの吹き出しです。
想像・悩み・考え事風見出し2
<h2>吹き出し風の見出し</h2>h2 {
position: relative;
margin-bottom: 2em;
padding: 1.5rem 2rem;
border-radius: 10px;
background: #eee;
}
h2:before,
h2:after {
position: absolute;
content: '';
border-radius: 50%;
background: #eee;
}
h2:before {
right: 30px;
bottom: -15px;
width: 30px;
height: 30px;
}
h2:after {
right: 50px;
bottom: -30px;
width: 15px;
height: 15px;
}
左右逆にしたパターンです。
背景パターンを工夫した見出し
CSSのbackgroundで背景パターンを作成した見出しデザイン例です。
CSSを使うことでも背景パターンを作成できますが、パターンの内容によってはSVG画像などを背景パターンに使ったほうが綺麗で確実な場合もあります。
チェック柄背景の見出し
<h2>CSS見出しデザイン</h2>h2 {
padding: 1.65rem 2rem;
background-color: rgba(165, 210, 255, .4);
background-image:
linear-gradient(90deg, rgba(165, 210, 255, .3) 50%, transparent 50%),
linear-gradient(rgba(165, 210, 255, .3) 50%, transparent 50%);
background-size: 40px 40px;
}
linear-gradientを重ねることでチェック柄の背景を作成しています。
チェック柄背景の見出し2
<h2>CSS見出しデザイン</h2>h2 {
padding: 1.65rem 2rem;
color: #e5004f;
background-color: transparent;
background-image: linear-gradient(45deg, #f9dbdc 25%, transparent 25%, transparent 75%, #f9dbdc 75%, #f9dbdc),
linear-gradient(45deg, #f9dbdc 25%, transparent 25%, transparent 75%, #f9dbdc 75%, #f9dbdc);
background-size: 40px 40px;
background-position: 0 0, 20px 20px;
}
市松模様のような背景を作成しています。
チェック柄背景の見出し3
<h2>CSS見出しデザイン</h2>h2 {
padding: 1.65rem 2rem;
color: #22ac38;
background-color: transparent;
background-image: linear-gradient(45deg, #dfeeb9 25%, transparent 25%, transparent 75%, #dfeeb9 75%, #dfeeb9),
linear-gradient(-45deg, #dfeeb9 25%, transparent 25%, transparent 75%, #dfeeb9 75%, #dfeeb9);
background-size: 24px 24px;
}
市松模様をひし形にしたような背景を作成しています。
ドット柄背景の見出し
<h2>CSS見出しデザイン</h2>h2 {
padding: 1rem 2rem;
color: #fff;
background: #015dac;
background-image: radial-gradient(#0175d5 13%, transparent 13%), radial-gradient(#0175d5 13%, transparent 13%);
background-size: 50px 50px;
background-position: 0 0, 25px 25px;
}
radial-gradientでドットのような背景を作成しています。ドットのサイズはあまり大きくすると荒くなり見た目が悪くなります。きれいなドット柄の背景を作りたい場合はCSSではなく普通に背景画像を繰り返すようにしたほうがいいでしょう。
斜めストライプ柄の見出し
<h2>CSS見出しデザイン</h2>h2 {
padding: 1rem 2rem;
position: relative;
color: #fff;
background: linear-gradient(-45deg, darken(#eb6100, 3%) 25%, #eb6100 0, #eb6100 50%, darken(#eb6100, 3%) 0, darken(#eb6100, 3%) 75%, #eb6100 0);
background-size: 20px 20px;
}
linear-gradientに角度を付けて指定して斜めストライプの背景柄を作成しています。縦ストライプも角度調整で作成できます。
斜めストライプ柄の見出し
<h2>CSS見出しデザイン</h2>h2 {
padding: 1.5rem 2rem;
position: relative;
color: #fff;
background: linear-gradient(-45deg, darken(#eb6100, 3%) 25%, #eb6100 0, #eb6100 50%, darken(#eb6100, 3%) 0, darken(#eb6100, 3%) 75%, #eb6100 0);
background-size: 20px 20px;
&:before,
&:after {
position: absolute;
width: 100%;
height: 4px;
content: '';
}
&:before {
top: 4px;
left: 0;
background: darken(#eb6100, 6%);
}
&:after {
bottom: 4px;
left: 0;
background: darken(#eb6100, 6%);
}
}
ストライプ背景柄に少しアクセントを追加してみた見出しデザインです。
テキストの見せ方を工夫した見出し
CSSでテキストに直接スタイルを当てた見出しデザインや、テキストの見せ方を工夫した見出しデザインです。
文字を縁取りした見出し
<h2>CSS見出しデザイン</h2>h2 {
text-shadow: #fff 2px 0, #fff -2px 0, #fff 0 -2px, #fff 0 2px, #fff 2px 2px, #fff -2px 2px, #fff 2px -2px, #fff -2px -2px, #fff 1px 2px, #fff -1px 2px, #fff 1px -2px, #fff -1px -2px, #fff 2px 1px, #fff -2px 1px, #fff 2px -1px, #fff -2px -1px;
}
CSSのtext-shadowを使うことで文字を縁取ることができます。縁取る境界線のサイズはtext-shadowの値で変えることができますが、あまり大きくするとカクカクした感じになります。
文字を縁取りして影を付けた見出し
<h2>CSS見出しデザイン</h2>h2 {
text-shadow: #fff 2px 0, #fff -2px 0, #fff 0 -2px, #fff 0 2px, #fff 2px 2px, #fff -2px 2px, #fff 2px -2px, #fff -2px -2px, #fff 1px 2px, #fff -1px 2px, #fff 1px -2px, #fff -1px -2px, #fff 2px 1px, #fff -2px 1px, #fff 2px -1px, #fff -2px -1px, rgba(0, 0, 0, .5) 3px 3px 3px;
}
text-shadowはいくつも指定できるので、縁取り用のshadowと、影を作るためのshadowと両方を指定することができます。
文字を立体的に見せた見出し
<h2>CSS見出しデザイン</h2>h2 {
font-size: 3rem;
color: #fff;
text-shadow: 0 1px 0 #ccc, 0 3px 0 #ccc, 0 4px 10px rgba(0, 0, 0, .2);
}
text-shadowを使って、文字を立体的に見せたデザイン例です。
最初の一文字を強調した見出し
<h2>CSS見出しデザイン</h2>h2:first-letter {
font-size: 150%;
color: #eb6100;
}
これもよく見る見出しのデザインですね。
:first-letterを使って最初の一文字目にのみスタイルを当てています。
文字を傾けて影を付けた見出し
<h2>Headline</h2>h2 {
font-size: 3.4rem;
font-style: italic;
letter-spacing: .1em;
color: #fff;
text-shadow: -3px 2px 0 #000;
}
拡がりの無い影を使って文字をちょっとおしゃれに見せたデザイン例です。
文字を傾けて影を付けた見出し2
<h2>Headline</h2>h2 {
font-size: 3.4rem;
font-style: italic;
letter-spacing: .1em;
color: #fff;
text-shadow: -4px 3px 0 #fa4141, -8px 6px 0 #000;
}
背景色と同じ色のtext-sahdowを付けることで文字のデザインを工夫しています。
カギ括弧を付けた見出し
<h2>Headline</h2>h2 {
position: relative;
padding: 1em 2em;
text-align: center;
}
h2:before,
h2:after {
position: absolute;
content: '';
}
h2:after {
top: 0;
left: 0;
width: 50px;
height: 50px;
border-top: 2px solid #000;
border-left: 2px solid #000;
}
h2:before {
right: 0;
bottom: 0;
width: 50px;
height: 50px;
border-right: 2px solid #000;
border-bottom: 2px solid #000;
}
擬似クラスで正方形を作り左上と右下に設置しています。左上のカッコでは上側と左側にborderを、右下のカッコには右側と下側にborderを設定しています。正方形のサイズとborderのサイズを変えることでカギ括弧のサイズを変えることができます。
シンボルを追加した見出し
<h2><span>01</span>CSS見出し</h2>h2 {
position: relative;
overflow: hidden;
padding: 1.5rem 2rem 1.5rem 130px;
border: 2px solid #000;
}
h2:before {
position: absolute;
top: -150%;
left: -100px;
width: 200px;
height: 300%;
content: '';
-webkit-transform: rotate(25deg);
transform: rotate(25deg);
background: #000;
}
h2 span {
font-size: 40px;
font-size: 4rem;
position: absolute;
z-index: 1;
top: 0;
left: 0;
display: block;
padding-top: 3px;
padding-left: 16px;
color: #fff;
}
「01」の部分は別の文言やアイコンでもいいでしょう。STEPなど流れを説明する時の見出しで良いかもしれません。
シンボルを追加した見出し2
<h2><span>02</span>CSS見出し</h2>h2 {
position: relative;
overflow: hidden;
padding: 1.5rem 2rem 1.5rem 130px;
border-top: 3px solid #000;
}
h2:before {
position: absolute;
top: -150%;
left: -100px;
width: 200px;
height: 300%;
content: '';
-webkit-transform: rotate(25deg);
transform: rotate(25deg);
background: #000;
}
h2 span {
font-size: 40px;
font-size: 4rem;
position: absolute;
z-index: 1;
top: 0;
left: 0;
display: block;
padding-top: 3px;
padding-left: 16px;
color: #fff;
}
見せ方を少し変えたパターンです。
シンボルを追加した見出し3
<h2><span>03</span>CSS見出し</h2>h2 {
position: relative;
overflow: hidden;
padding: 1.5rem 2rem 1.5rem 130px;
word-break: break-all;
border-top: 3px solid #000;
border-radius: 12px 0 0 0;
}
h2 span {
font-size: 40px;
font-size: 4rem;
position: absolute;
top: 0;
left: 0;
display: block;
padding: 3px 20px;
color: #fff;
border-radius: 10px 0 20px 10px;
background: #000;
}
少し丸くしてみたパターンです。
アイコンを追加した見出し
<h2><span><i class="fas fa-yen-sign"></i></span>CSS見出しデザイン</h2>h2 {
position: relative;
overflow: hidden;
padding: 1.5rem 2rem 1.5rem 80px;
border: 3px solid #000;
border-radius: 100vh;
}
h2 span {
font-size: 30px;
font-size: 3rem;
line-height: 50px;
position: absolute;
top: calc(50% - 25px);
left: 10px;
display: block;
width: 50px;
height: 50px;
color: #fff;
border-radius: 50%;
background: #000;
}
アイコンを追加してみたパターンです。アイコンの見せ方は様々あるので使う箇所に適したデザインにしてみましょう。
シンボルを追加した見出し4
<h2><span>01</span>CSS見出しデザイン</h2>h2 {
position: relative;
height: 75px;
margin-right: 100px;
padding: 1.5rem 2rem 0 2rem;
word-break: break-all;
color: #fff;
background: #000;
}
h2:after {
position: absolute;
top: 0;
right: -55px;
width: 0;
height: 0;
content: '';
border-width: 75px 55px 0 0;
border-style: solid;
border-color: #000 transparent transparent transparent;
}
h2 span {
font-size: 40px;
font-size: 4rem;
position: absolute;
top: 0;
right: -100px;
display: block;
padding-top: 3px;
padding-left: 16px;
color: #000;
}
右側にシンボルを追加してみたパターンです。複数行での使用は想定していません。
シンボルを追加した見出し5
<h2><span>01</span>CSS見出しデザイン</h2>h2 {
position: relative;
padding: 1.5rem 2rem 1.5rem 160px;
border-bottom: 3px solid #000;
}
h2 span {
font-family: 'Roboto', sans-serif;
font-size: 100px;
font-size: 10rem;
line-height: 1;
position: absolute;
bottom: -1.6rem;
left: 0;
}
サンプルの「01」の部分にはwebフォントで「Roboto」というフォントを使っています。
borderと影を使った見出し
<h2><span>CSS見出しデザイン</span></h2>h2 {
position: relative;
text-align: center;
border: 3px solid #000;
}
h2:before,
h2:after {
position: absolute;
content: '';
}
h2:before {
top: 4px;
left: 4px;
width: calc(100% - 8px);
height: calc(100% - 8px);
background: #f8f8f8;
}
h2 span {
position: relative;
display: block;
padding: 2rem;
letter-spacing: .05em;
color: #fff;
text-shadow: #000 2px 0, #000 -2px 0, #000 0 -2px, #000 0 2px, #000 2px 2px, #000 -2px 2px, #000 2px -2px, #000 -2px -2px, #000 1px 2px, #000 -1px 2px, #000 1px -2px, #000 -1px -2px, #000 2px 1px, #000 -2px 1px, #000 2px -1px, #000 -2px -1px, 4px 4px 0 #000, 0 4px 0 #000;
}
h2 span:before,
h2 span:after {
position: absolute;
left: 10px;
width: calc(100% - 20px);
height: 2px;
content: '';
background: #000;
}
h2 span:before {
top: 15px;
}
h2 span:after {
bottom: 15px;
}
背景やテキストの影、borderなどを使った見出しデザイン例です。
サブコピーを入れた見出し
<h2>CSS見出しデザイン</h2>h2 {
position: relative;
padding: 1rem 2rem;
text-align: center;
border: 3px solid #000;
}
h2:before {
font-size: 15px;
font-size: 1.5rem;
position: absolute;
top: -24px;
left: -3px;
height: 24px;
padding: 0 1em;
content: 'POINT';
color: #fff;
background: #000;
}
「POINT」というサブコピーを見出しに入れてみたデザインです。POINTの部分は擬似クラスのcontentに記載しています。
サブコピーを入れた見出し2
<h2>CSS見出しデザイン</h2>h2 {
position: relative;
padding: 1rem 2rem;
text-align: center;
border: 3px solid #000;
border-radius: 0 10px 10px 10px;
}
h2:before {
font-size: 15px;
font-size: 1.5rem;
position: absolute;
top: -24px;
left: -3px;
height: 24px;
padding: 0 1em;
content: 'POINT';
color: #fff;
border-radius: 10px 10px 0 0;
background: #000;
}
角丸にしてみたパターンです。
サブコピーを入れた見出し3
<h2>CSS見出しデザイン</h2>h2 {
position: relative;
padding: 1rem 2rem;
text-align: center;
color: #22ac38;
border-radius: 0 10px 10px 10px;
background: #e3f5d8;
}
h2:before {
font-size: 15px;
font-size: 1.5rem;
position: absolute;
top: -24px;
left: 0;
height: 24px;
padding: 0 1em;
content: '\POINT';
color: #fff;
border-radius: 10px 10px 0 0;
background: #22ac38;
}
色を付けてフラットにしたパターンです。同系色でまとめると綺麗です。
サブコピーを入れた見出し4
<h2>CSS見出しデザイン</h2>h2 {
position: relative;
padding: 1rem 2rem;
text-align: center;
color: #0075a9;
border-radius: 0 10px 10px 10px;
background: #d8ecf5;
}
h2:before {
font-family: 'Font Awesome 5 Free';
font-size: 15px;
font-size: 1.5rem;
position: absolute;
top: -24px;
left: 0;
height: 24px;
padding: 0 1em;
content: '\f0a4 POINT';
color: #fff;
border-radius: 10px 10px 0 0;
background: #0075a9;
}
サブコピーにアイコンを使用してみたパターンです。アイコンも擬似クラスで指定しています。
サブコピーを入れた見出し5
<h2><span>01</span>CSS見出しデザイン</h2>h2 {
position: relative;
padding-left: 4em;
}
h2 span {
position: absolute;
top: 0;
left: 0;
padding: 0 2rem;
color: #e3f5d8;
background: #22ac38;
}
h2 span:after {
position: absolute;
top: calc(50% - 7px);
right: -11px;
width: 0;
height: 0;
content: '';
border-width: 7px 0 7px 12px;
border-style: solid;
border-color: transparent transparent transparent #22ac38;
}
吹き出しのようなアイコン・サブコピーを入れた例です。
サブコピーを入れた見出し5
<h2><span><i class="far fa-hand-point-right"></i>01</span>CSS見出しデザイン</h2>h2 {
position: relative;
padding-left: 5em;
}
h2 span {
position: absolute;
top: 0;
left: 0;
padding: 0 1.5rem;
color: #fff;
border-radius: 10px;
background: #0075a9;
}
h2 span i {
margin-right: 1rem;
}
h2 span:after {
position: absolute;
top: calc(50% - 7px);
right: -11px;
width: 0;
height: 0;
content: '';
border-width: 7px 0 7px 12px;
border-style: solid;
border-color: transparent transparent transparent #0075a9;
}
アイコンを追加してみた例です。
左右にアイコンを置いた見出し
<h2>CSS見出しデザイン</h2>h2 {
position: relative;
display: inline-block;
padding: 0 2em;
text-align: center;
}
h2:before,
h2:after {
font-family: 'Font Awesome 5 Free';
line-height: 1;
position: absolute;
top: calc(50% - .5em);
color: #eb6100;
}
h2:before {
left: 0;
content: '\f101';
}
h2:after {
right: 0;
content: '\f100';
}
左右にアイコンを設置してみた例です。一行だけの場合なら文の前後にアイコンを置くだけでよいですが、複数行になるケースも想定する必要がある場合はpositionでアイコンの位置を指定するようにします。
CSSで作る見出しデザインまとめ
いかがでしたでしょうか。あまり使うケースが考えられない見出しデザインも多かったと思いますが、何かのときに参考にしていただければと思います。
